First Combat Robot

Shin Kicker V1

Shin Kicker V1 was my first 1lb antweight combat robot. It was a fully 3D printed vertical spinner built for HACR and the PLAnt category, based loosely on Team ORBY’s MAK VS after a lot of kit research and redesign.

Project Specs

Bot Type Vertical spinner
Build Style Fully 3D printed
Event North Texas Bot Battles
Status Retired V1

Build Log

Initial Idea

For years I wanted to make a combat robot, partly for fun and partly because it forces you to learn real engineering skills: rapid prototyping, repairing things, and making improvements after failure.

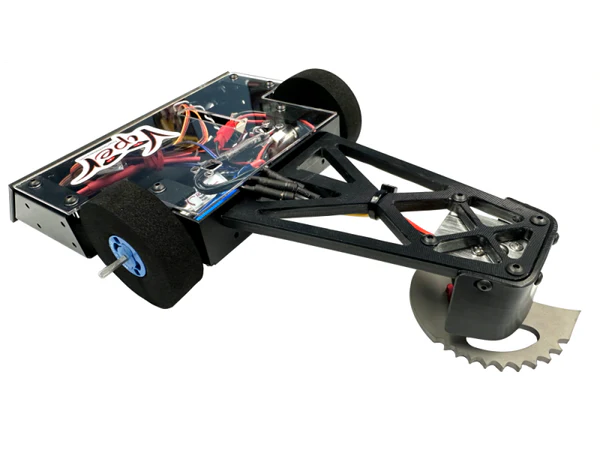
At first, I wanted to buy a kit for the normal antweight category. The kit was called the Viper, and it had a blade on the back. Then I found the PLAnt category, which let me use my 3D printing experience to cheaply repair and revise the robot.

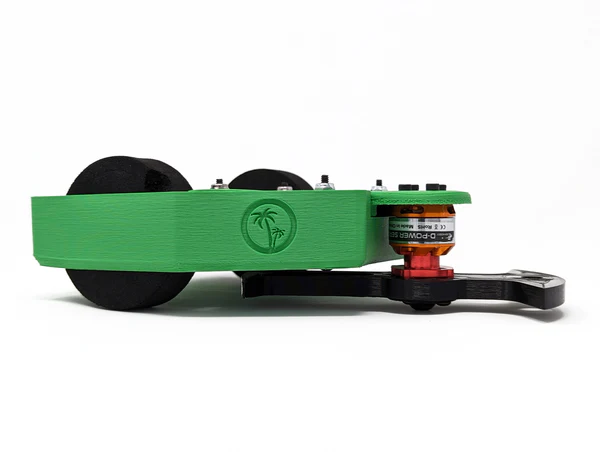
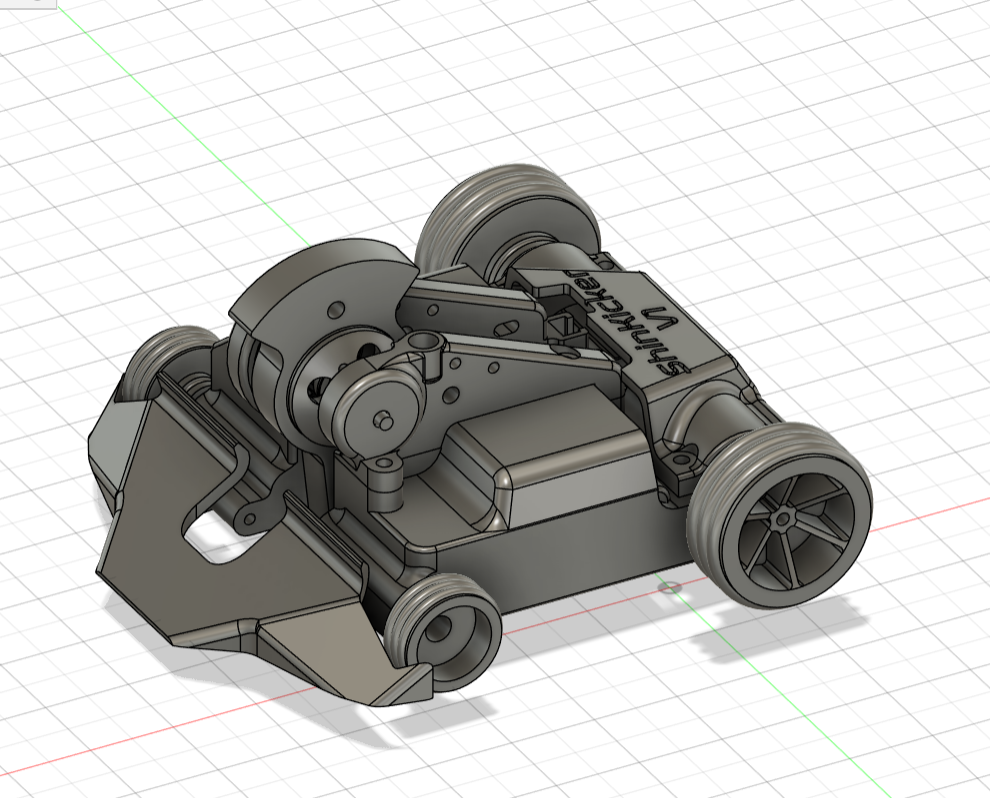
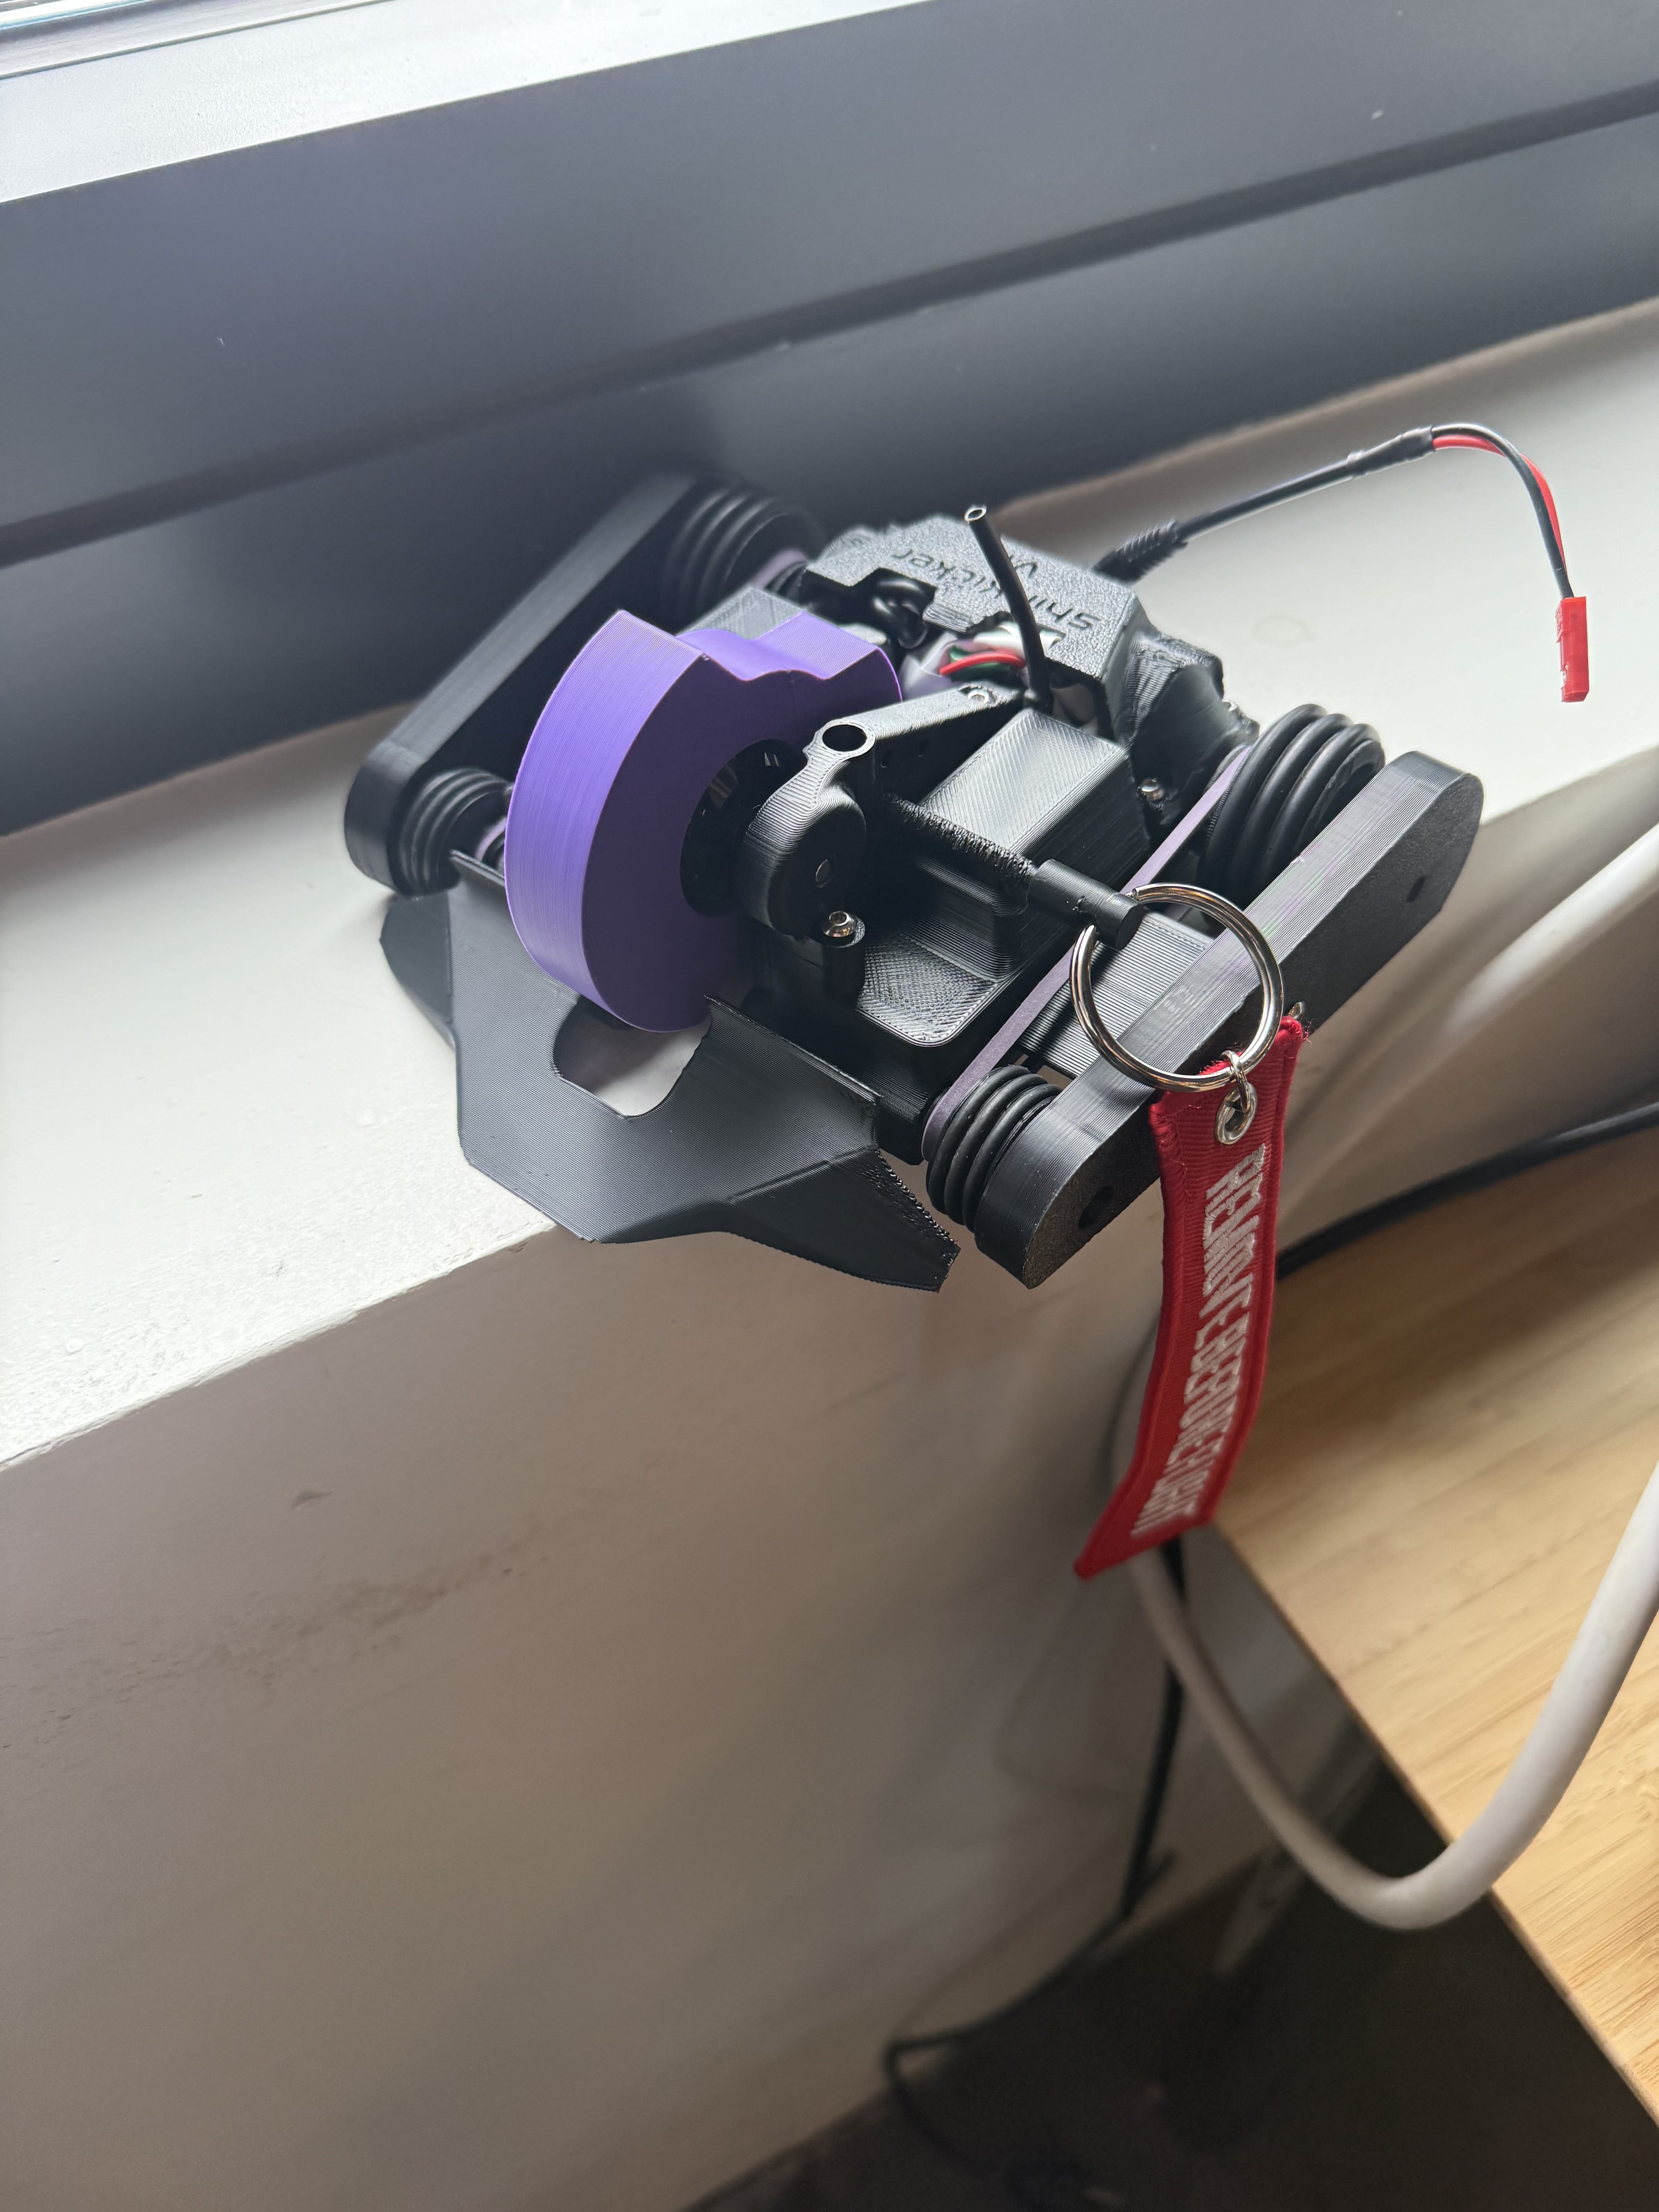
After researching kits, I found Palm Beach Bots’ Plastic Poison kit, which had the parts I needed to start. More experienced builders told me that kit did not perform especially well, and I eventually found Team ORBY’s MAK VS. I used that robot as the starting point for Shin Kicker.

Viper combat robot kit

Viper Kit

The first kit I looked at before moving toward a custom PLAnt build.

Plastic Poison combat robot kit

Plastic Poison

The kit that helped define the starting electronics and parts direction.

MAK VS

The ORBY robot that became the main reference for Shin Kicker.

Material Planning

Parts And Hardware

Electronics, Screws, And Bearings

The first thing I did was learn more about how antweight combat robots work and what components I needed. That meant drive motors, weapon motors, ESCs, receivers, batteries, and the hardware to hold everything together.

Taking inspiration from proven kits, I picked the electronics shown in the BOM image. I also started deciding what plastic to use for different parts. I chose M3 screws because they were light and strong, found correctly sized O-rings for wheel grip, and added bearings for the front wheels and weapon.

Shin Kicker bill of materials

Electronics BOM

The electronics direction based on proven antweight setups.

CAD

Designing

I started with the original model and added my components into CAD to make sure everything fit. Then I worked on designing a new, more powerful weapon.

I designed both symmetrical and asymmetrical weapons, but after doing the calculations, I found they were weak and would have little to no impact. Taking inspiration from the original weapon, I designed a much bulkier weapon that would pack nearly 100J of force.

After finalizing the weapon, I revised the rest of the design by adding wheel guards, more cable storage, and an area for the safety switch. After that, I was ready to make the parts.

Shin Kicker V1 CAD

V1 CAD

Original model with components placed inside to check fit.

Shin Kicker V1 weapon concepts

Weapon Concepts

The first symmetrical and asymmetrical weapon ideas.

Shin Kicker V2 weapon CAD

V2 Weapon

The bulkier weapon design after calculations showed the earlier ones were too weak.

Shin Kicker V2 CAD

V2 CAD

The revised robot with wheel guards, cable space, and safety switch placement.

Final Product

Assembly And Test

One Pound Exactly

After fully assembling Shin Kicker, it weighed in at almost exactly one pound. With that done, I tested it against an old BattleBots toy. The results spoke for themselves, and Shin Kicker was ready for competition.

Shin Kicker final weight

Final Weight

Almost exactly one pound after assembly.

Test Hit

Testing the weapon against an old BattleBots toy.

North Texas Bot Battles

First Match

My first match was against a University of Texas team with a massive overcutter called Eviscerator. I knew I needed protection on the front of the bot, so I mounted my plow to absorb most of the hits.

The plow shattered quickly, leaving the front open. I got a hit or two in, but Eviscerator hit my biggest weak spot and shattered the robot. I could still drive for a while until my wheels broke.

Shin Kicker before competition

Before Competition

Shin Kicker before the first match, with the front plow mounted.

First Match

The fight against Eviscerator at North Texas Bot Battles.

Shin Kicker after competition

Aftermath

The most likely failure was that both weapons collided and the trusses holding up my weapon sheared off. The weapon essentially exploded and was no longer attached to the robot.

I tried hard to fix the robot for my next match, but I would have had to rebuild almost the whole frame because of the fractures. The electronics also had an issue where the receiver was not getting power, so I had to forfeit.

Results

Retired V1

What Comes Next

I retired Shin Kicker V1 because it had too many design issues. A version 2 would need a more compact design, better cable management, thicker and stronger armor, and armor that is easier to swap out when it breaks.

This robot became a mix of everything I learned from building my first combat bot. The event itself was a great experience, and everyone there was helpful, whether they were lending tools or helping me diagnose what went wrong.

Key Takeaways

Weak Spots Matter

A single exposed area can decide the whole match.

Repair Access Matters

If a robot is hard to repair between matches, the event gets much harder.

Armor Is Consumable

Combat robots need armor that can break and be replaced quickly.

V1 Did Its Job

The first version taught the lessons needed for a better second version.