Halloween Automation

Skele-Dropper V2

Skele-Dropper V2 was my Halloween 2024 revival of the original project: a web-triggered prop that drops a skeleton, flashes strobes, plays loud audio, and records a scare cam reaction. The final version changed a lot once the full-size skeleton turned out to be heavier than the mechanism wanted.

Project Specs

ControlWeb interface
Main ActuatorSolenoid latch
ProcessorRaspberry Pi 4B
StatusSuccessful pivot

Build Log

Overview

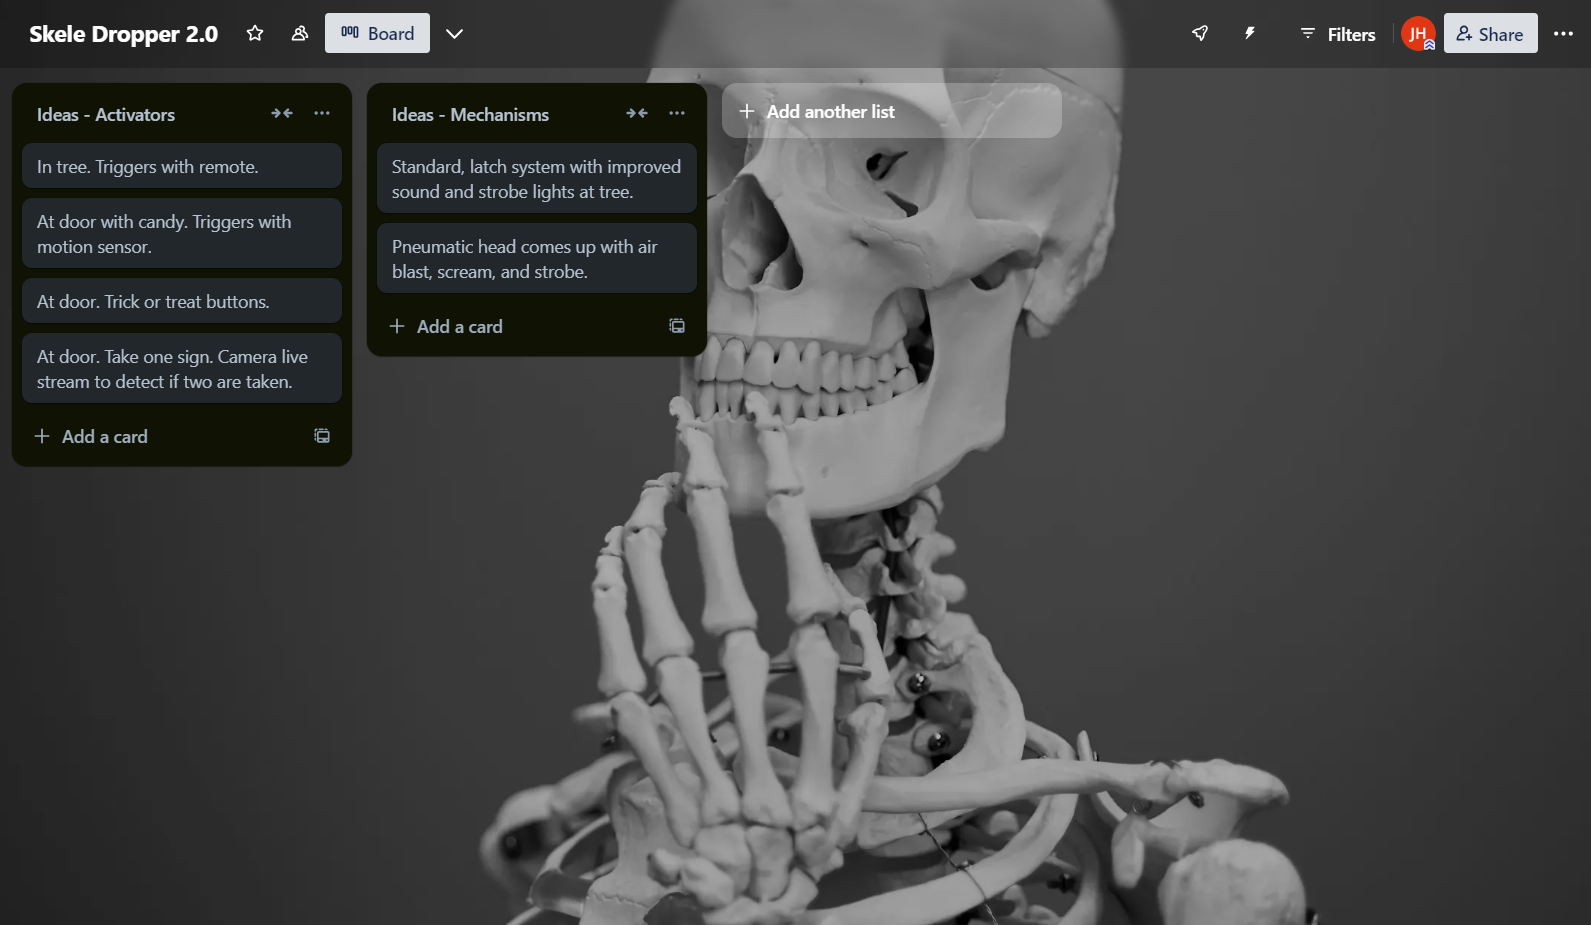
After Skele-Dropper V1 failed the previous year, I decided to revive the project for Halloween 2024. The core idea stayed the same: drop a skeleton from above, flash strobe lights, play a loud scream, and record video of the reaction with consent.

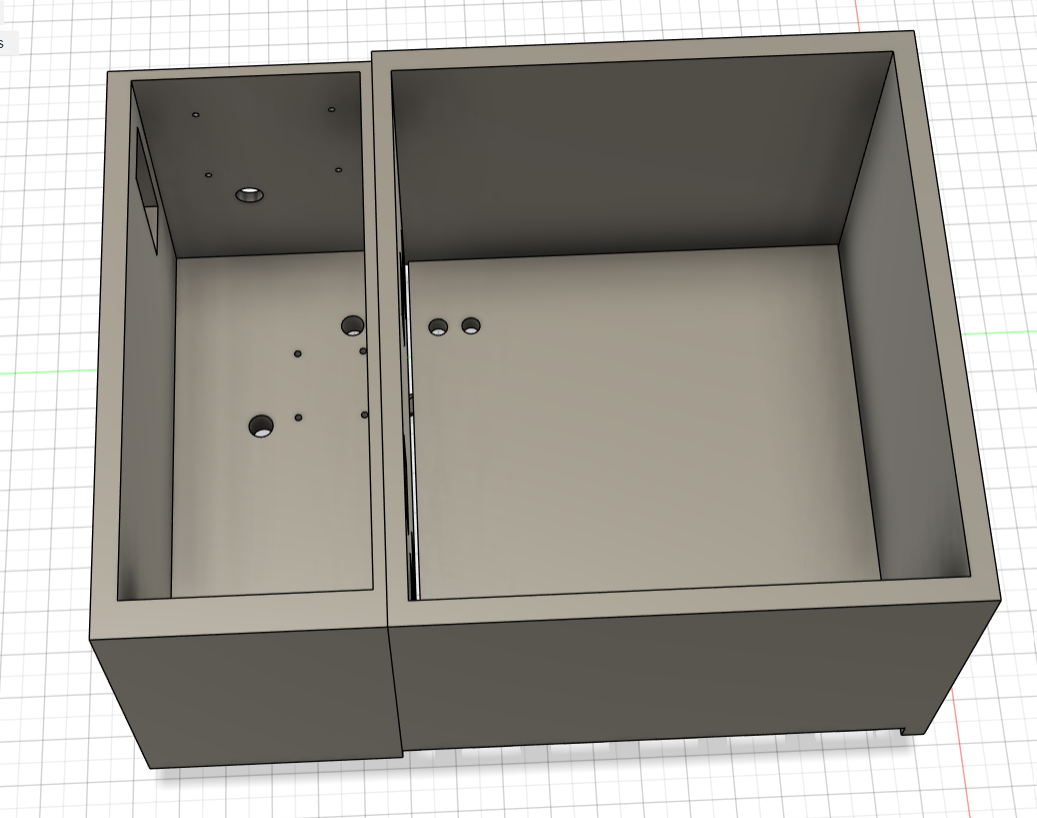
The new version changed the mechanism. Instead of a slow stepper motor lowering the skeleton, I planned to use a solenoid latch like a door latch to drop the skeleton from an enclosed spot. I also planned to use a guitar amp over Bluetooth instead of a weak microcontroller-powered speaker.

Initial Idea

8/24/24 to 8/26/24: After a burst of inspiration, I revived the project in a new form. I used Trello to organize brainstorming, including “take one candy” traps and more complicated ideas, but decided to stick with a simpler mechanic based on last year’s project.

Skele-Dropper V2 Trello planning board

Trello Planning

The early brainstorming board for the Halloween 2024 version.

Material Planning

8/26/24 to 9/2/24

Parts, Filament, And WiFi

This year, instead of just assuming parts would work, I did a lot of research before buying anything. Most parts came from Adafruit because I had used them before. I chose a Raspberry Pi 4B as the main processor because it was available and had enough performance.

The main parts I needed were for the solenoid, power, and a motion sensor for autonomous activation. I also had to account for the parts I already owned.

Another thing to consider was the filament cost for the main structure and casing. Last year, the biggest issue was weak WiFi that could not reliably host the control site. I tested the new control board by enabling SSH and bringing the computer to the tree where the prop would hang. The signal bounced back, but it took longer than I wanted, so I decided to buy an external antenna.

Adafruit bill of materials

BOM

The main electronics and solenoid-related parts.

Filament cost planning

Filament

Material planning for the structure and casing.

WiFi statistics

WiFi Test

The first outdoor network test for the new control setup.

CAD

CAD V1

9/2/24: CAD started. On 9/7/24, the first CAD run was complete. I chose a simple system with a large area to hold the skeleton and a hatch below it held shut by the solenoid latch.

The larger box was for the skeleton, and the smaller box was for the electronics. Once I saw the model, it was obvious the skeleton enclosure was too small. I also needed a hole to thread rope through so the hatch could be pulled back up.

CAD V2

9/13/24: CAD V2 was finished with a larger enclosure and holes for the rope.

Skele-Dropper V2 CAD V1

CAD V1

The first hatch and enclosure design.

Skele-Dropper V2 CAD V1 enclosure

Enclosure Check

The skeleton area was too small and needed revision.

Skele-Dropper V2 CAD V2

CAD V2

The larger enclosure with rope holes added.

Prototype

9/21/24

Prototype work started after the components arrived and the parts were printed. I began by tinkering with the motion sensor and MOSFET solenoid driver, making a simple circuit to test the basic trigger system.

After that, I finished wiring and assembling the rest of the electronics enclosure.

9/28/24

I started programming, beginning with the lights because they were the hardest part due to the proprietary libraries needed to run them. Eventually, I got them functioning.

10/12/24

After too many compatibility issues, the speaker system had to be abandoned. Testing was next.

Solenoid Test

Motion sensor and MOSFET solenoid driver circuit.

Prototype electronics enclosure

Enclosure Wiring

First electronics enclosure assembly.

Prototype electronics enclosure

Prototype Assembly

More of the physical enclosure and electronics work.

Light demonstration

Light Demo

The strobe/light system after getting the libraries working.

Testing And Revision

10/26/24 to 10/27/24

Too Heavy

I ran tests and concluded that the skeleton itself was too heavy. I tried adding a pulley setup with a counterweight, but that failed. Then I cut all the limbs off the skeleton, and even that did not solve it.

I realized the hatch was also a problem because it was made from slightly hollow PETG and was very heavy. I reprinted it in PLA-AERO, a lightweight material, but even that did not fully fix it. Eventually I realized that if the skeleton was right on the edge of the wall, it would trigger about half the time. With Halloween close, I moved on.

Failed Test

One of the failed mechanism tests while chasing the weight issue.

More Testing

More iteration on the drop system before the final pivot.

Final Product

Halloween Pivot

On Halloween, the original setup was not working well. The latch would not open reliably under the skeleton’s weight, and I could not pull it high enough to hide it.

Eventually I got it barely working, but barely working was not enough. My dad said getting it to work once would be enough, but I wanted a better reaction. I realized the scare had to be close to people, and the only thing I could guarantee people would get close to was the candy bowl.

I moved the candy bowl under the Skele-Dropper, loaded in a tiny skeleton, and set it up so when people reached into the bowl, the skeleton would drop on them.

New System

The revised candy-bowl approach after the Halloween pivot.

Successful Drop

The final mechanism working with the smaller skeleton setup.

Final Test

Halloween Night

Reactions

Everything went great with the new system. Sadly, I did not get good reactions on camera. Most people either shrieked or were not phased. A few outliers made it worth it, including my brother’s friends thinking I was going to drop a live animal on them and refusing to grab candy, and another girl livestreaming to her friends who screamed and threw her phone in the air.

Some people were also interested in the components and mechanisms, and I was happy to show them how it worked.

Results

Done For Now

What I Learned

I was incredibly happy with how it turned out. It was one of my first projects to succeed this much and a great way to end the Skele-Dropper line for now. It was fun and frustrating, but overall it was a massive learning experience.

I learned how to manage power more efficiently, how solenoids work, how audio drivers work, how routers and WiFi-related systems behave, and most importantly, how to pivot when needed.

Key Takeaways

Test Weight Early

The full skeleton and hatch were heavier than the mechanism wanted.

Wireless Matters

A control site is only useful if the outdoor connection is reliable.

Pivot Fast

The candy-bowl version worked because it used the behavior people already had.

Simple Wins

The final mechanism was simpler than the original plan and much more effective.